Shadowrocket Setup Guide
Import, Connect & Verify
Follow five steps using the iPhone or iPad interface. First get one existing server entry working, then check the rules. There is no need to change every setting at the outset.
- 01 Add
- 02 Choose a mode
- 03 Connect
- 04 Verify
- 05 Troubleshoot
Screenshots are official App Store materials, provided to help identify pages and fields. The layout may change with app updates; follow the current app interface. Do not copy server details shown in screenshots.
Add Server: Add a server or import a subscription
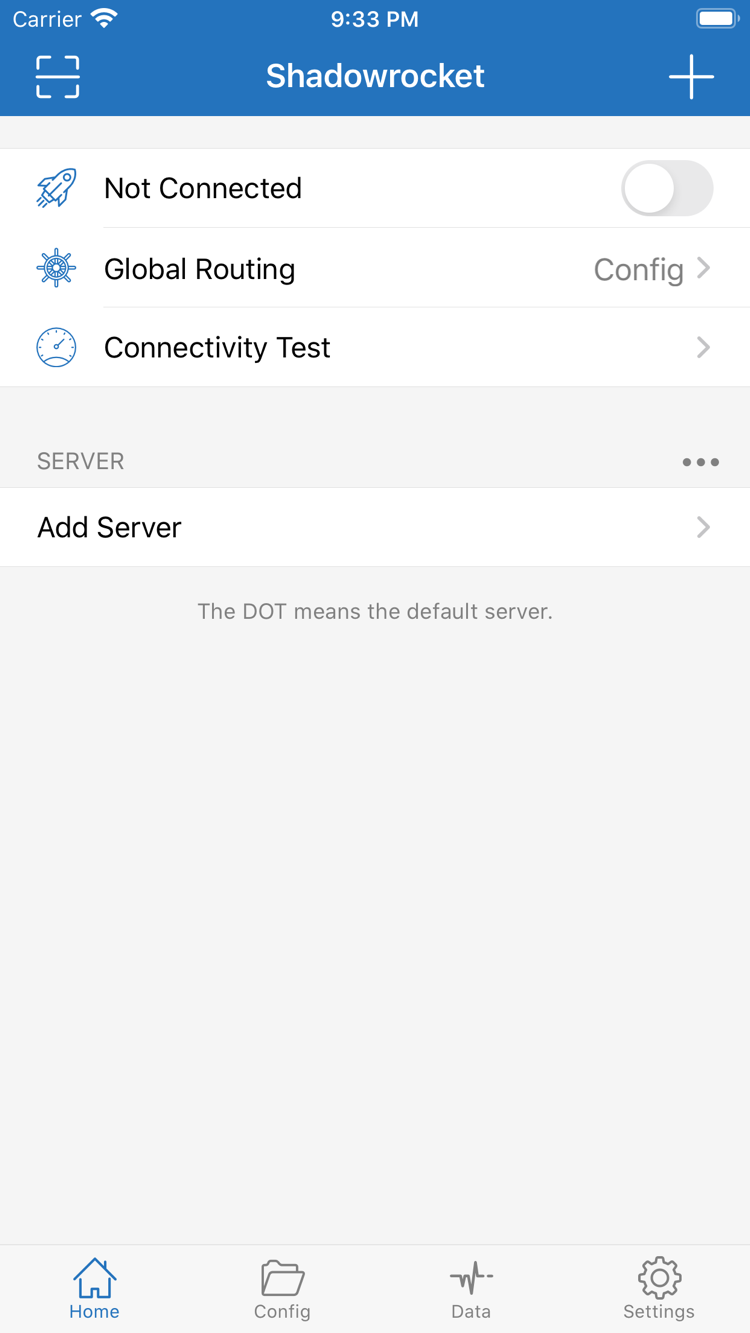
Open Shadowrocket and go to Home. If you have not added any details yet, it is normal for the SERVER group to have no selectable servers. Tap Add Server to open the add screen, then choose an import method based on the details you have: a subscription link, a single server share, a QR code, and manual fields are different input types. Do not paste a full subscription link into Host.
Use an existing subscription link
After opening Add Server, tap Type and select Subscribe. Paste the full subscription link in the URL field. Check for line breaks, spaces, or explanatory text copied from a chat message, especially at the end of the link. Enter a name that will help you identify it, then save. Wait for the app to fetch and parse the content, then return to Home and check whether an entry appears under SERVER.
Saving successfully means the input was saved; it does not mean the subscription was downloaded successfully. If no entry appears, first check whether your current network can access the subscription address and whether the link is still valid. Do not create multiple copies of the same subscription in an attempt to fix it. The returned content must contain connection details that the app can parse. A webpage, login page, or error text cannot be used directly as a server list.
Use single-server details or a QR code
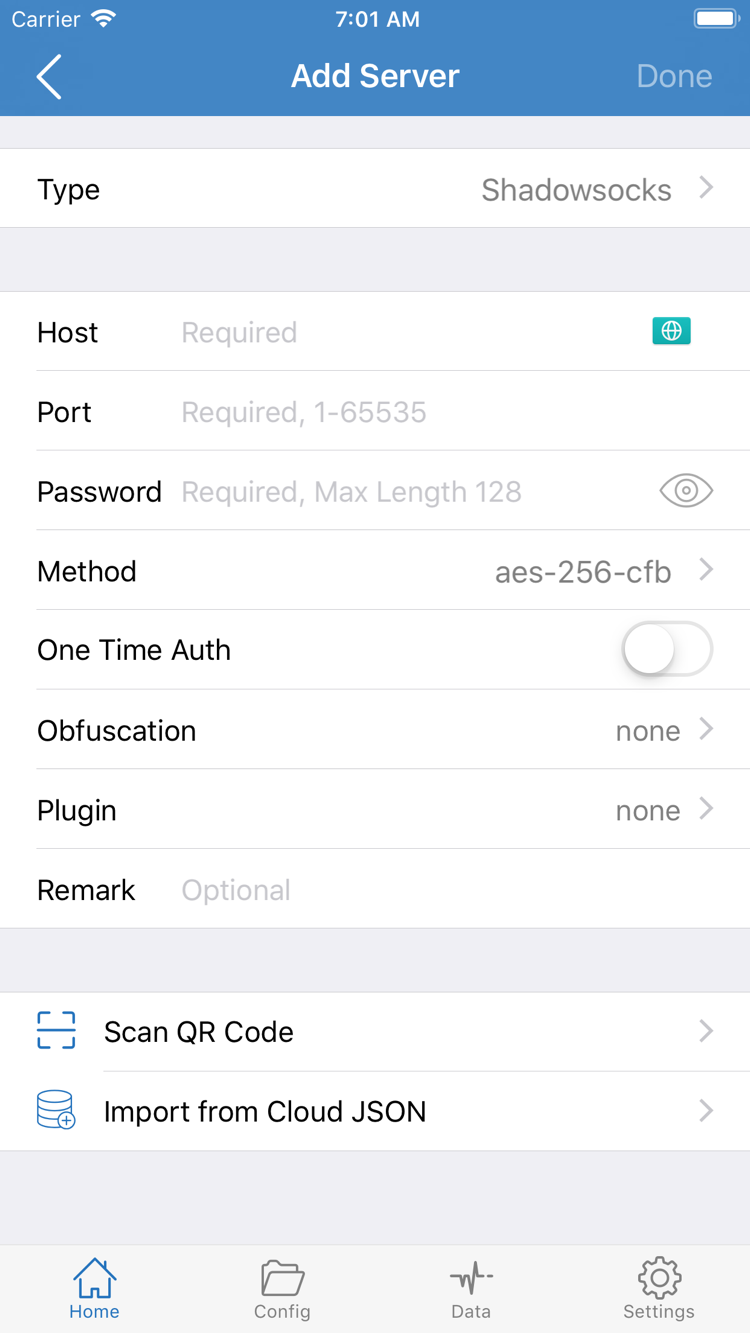
For manual setup, first select the protocol that matches your details under Type, then fill in Host, Port, and any other fields required by that protocol. For example, with Shadowsocks, check Password and Method. Other protocols may display different identity or transport settings. If you are unsure about a field, check the original details rather than guessing from its name. Do not enter one protocol's password into another protocol's identity field.
If you have a QR code, use Scan QR Code on the add screen and grant camera permission when prompted by the system. After scanning, check Type and the server fields. Import from Cloud JSON is a separate import option, not the same as Subscribe, and is not intended for pasting an ordinary subscription link. Complete one import method; you do not need to try every option.
Finally, return to Home and select an entry under SERVER that you are authorized to use. Check that it is selected. Seeing many names in the list does not mean they are all working. Keep one clearly identified test entry for now; in the next step, choose how requests should be handled.
Global Routing: Choose one of three modes
After selecting a server, return to Home and tap Global Routing. This determines how requests are handled; it does not switch the server protocol. The three modes are Config, Proxy, and Direct. Decide what you want to test first, then choose the corresponding option. Avoid repeatedly switching modes while troubleshooting without keeping track of each change.
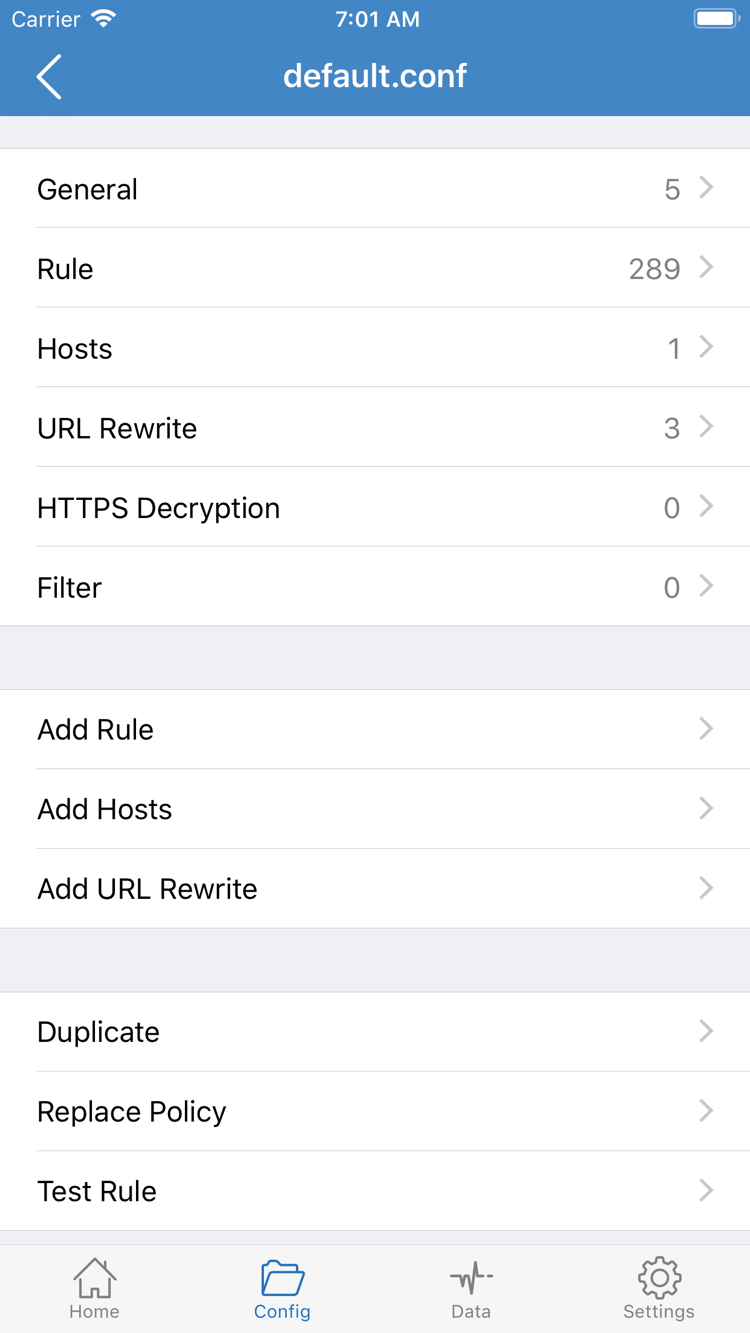
Config uses the rules in the current configuration file to determine where requests go, making it suitable for rule-based routing. Before using it, open Config and confirm that a suitable configuration file exists and is enabled. Importing a subscription usually provides server entries; it does not necessarily provide a complete rule configuration. Check the server list and configuration file separately.
Proxy processes requests through the selected proxy in this mode and can be used for a brief comparison test. If the same destination is accessible in Proxy but not in Config, check the rules and policies first. This mode cannot fix incorrect credentials, nor does it guarantee the same behavior in every app. Restore your usual mode after the comparison.
Direct connects directly. Do not assume that requests are using the selected server just because the switch is on. If you meant to test a proxy connection but selected Direct, opening an ordinary webpage in a browser is not enough to confirm that the server works. The mode, selected entry, and policy actually matched all need to be checked.
Understand a rule before first use
The Config page includes sections such as General and Rule. For now, focus on the Rule matching order; there is no need to change unrelated settings such as HTTPS Decryption. The following is an instructional excerpt, not a complete configuration that can be used as a replacement:
[Rule]
DOMAIN-SUFFIX,example.com,PROXY
GEOIP,CN,DIRECT
FINAL,PROXY
The first line sends requests matching example.com and its subdomains to PROXY. Requests matching the later GEOIP rule use DIRECT. Requests that do not match an earlier rule are handled by FINAL. Rules are checked from top to bottom, and the matching rule's policy is applied, so FINAL belongs last. PROXY also needs an available proxy selection; rule text alone does not create a server.
You have completed this step when you can identify the selected mode and, when using Config, the enabled configuration file. For details on rule types, REJECT, and configuration sections, see the Configuration Reference. Keep the settings stable for now and continue to the first connection.
Home: Turn on the connection switch at the top
Return to Home and check two things in order: a server is selected under SERVER, and Global Routing shows the mode you just chose. Then turn on the switch near the top of the page, initially shown beside Not Connected. Complete this step before checking a browser; a successful import is not the same as a successful connection.
When connecting for the first time, iPhone / iPad may show a system prompt to add a VPN configuration. Read the prompt, confirm that the action was just initiated by Shadowrocket, then allow it and authenticate using your device passcode or as required by the system. System authorization sets up a network connection on your device. It does not purchase an additional service, and you do not need to enter your subscription password in the system authentication prompt.
If you tapped Cancel earlier, the switch not staying on does not necessarily mean the server is unavailable. Turn it on again and check whether the authorization prompt reappears. If necessary, search for VPN in system settings and check the existing connection configuration and current status. Pause any other active VPN connection while troubleshooting to avoid it taking over traffic. Do not delete multiple configurations from your device without noting what they are.
After authorization, return to Home and wait for the status at the top to change. If the switch turns on and then immediately off, note the message on the current screen first, then check system authorization and server fields. Tapping through a dozen entries at once adds more variables and makes it harder to tell whether the issue is the configuration or a particular set of connection details.
A VPN status indicator on the device means the system connection status has changed. It does not prove that every request uses PROXY or that every server in a subscription is accessible. Global Routing may still be set to Direct, and Config may route some requests through DIRECT. Keep the app connected and verify using both a test and actual access in the next step, rather than relying on a single status indicator.
After this step, do not turn on On Demand yet. First verify that manual connection, disconnection, and reconnection work as expected. Consider automatic connection later; this makes it easier to distinguish manual actions from automatic triggers.
Verify: Test, browse, and check rule records
Step 04 · Check “connected” separately from “requests handled as expected.”
Run Connectivity Test, then try actual access
With the connection on, use Connectivity Test on Home. The test reflects reachability for the current test method and target; it does not mean every website, app, or transport is working. If the test responds, open a browser and visit a page you know should be available. If it times out, record the result before concluding that the entire subscription is unavailable.
For actual access checks, open a new page and reload it to avoid browser caching that can make results seem unchanged. Test one destination, then another for a different purpose; do not open many pages at once. If one destination fails while others work, investigate whether the destination itself, name resolution, or its rules differ instead of immediately reinstalling the app.
Check whether requests match the expected policy
To verify routing, open the request log or an available record view under Data. Find the request you just made and check the destination domain, matched rule, and policy. To verify PROXY, the corresponding request should show PROXY. If the record shows DIRECT, check Global Routing and the current configuration first. If the interface does not show enough detail, use Diagnostics in the next step to gather relevant information.
A brief comparison using the same destination is more useful: keep the server unchanged, switch from Config to Proxy, and try again. If the result changes, check the configuration's routing rules first. If both modes fail, check the server, network, and destination. Restore the original mode after the comparison and note the result so the temporary test mode is not left enabled.
Finally, turn the connection off, turn it on again, and repeat the access check. This helps confirm that success was not due to a previous cache or temporary state. Once manual connection is stable, continue with everyday use. Automatic connection, complex rules, and additional settings can be added one at a time later.
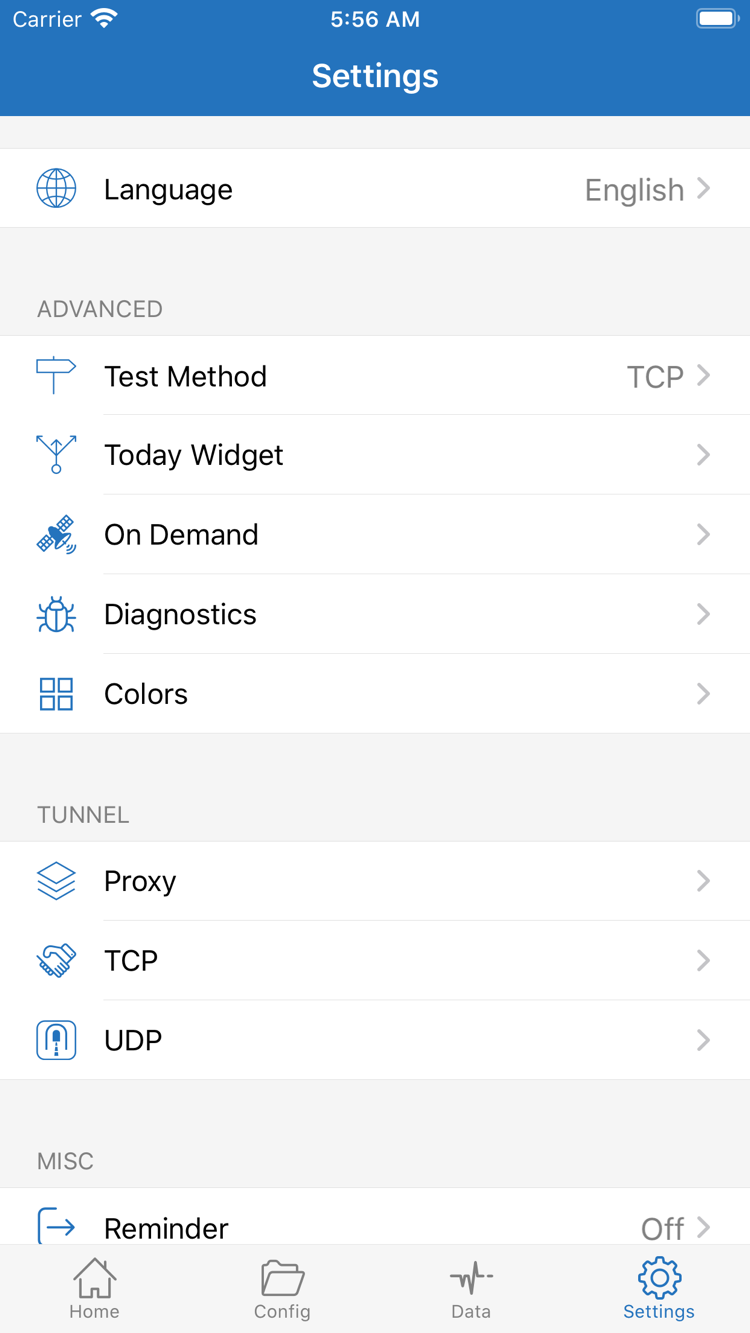
Settings: Troubleshoot by point of failure
When something goes wrong, first identify the step where it stopped, then open Settings to check related options. Test Method affects how tests are performed, while Diagnostics helps with diagnosis; neither can replace correct server fields. Record what happened, your current network, Global Routing, and the selected entry. Change one condition and try again to see what made a difference.
No server appears after import
Return to Subscribe and check whether the link is complete, whether you copied a webpage address instead, whether it contains whitespace, and whether the subscription is still valid. If the app reports a fetch failure, first confirm that the current network can access the address. If it reports a parsing failure, check the format of the returned content. If needed, ask the original provider to confirm the link status rather than posting it publicly. A subscription link may contain access credentials, so protect it like a password.
The switch will not stay on
First check whether system VPN configuration authorization is complete, then verify Type, Host, Port, and the fields required by the protocol. Note whether the error occurs before authorization, during connection, or after waiting. If another VPN is active, pause it and try again. If the device is managed by an organization or school, system policies may restrict changes; follow the device management requirements and do not repeatedly delete managed settings.
It shows connected, but pages will not load
Make sure Global Routing is not set to Direct by mistake, then cross-check Connectivity Test results against an actual webpage. Keep the configuration unchanged and try another network you can use, such as switching between Wi-Fi and cellular. Record the network conditions if the results differ. If only some domains fail, check DNS and the matched rules. If both modes fail, check the server status, credentials, and destination reachability first.
Access works, but routing is not as expected
Return to Config and confirm that the file you checked is the one enabled. Check whether broad rules appear before more specific rules, whether FINAL is at the end, and whether the policy in each rule matches its purpose. Do not change DNS, protocol, server, and all rules at once to fix one match. Reproduce the issue with one domain first, then adjust the relevant rule based on the request record.
When asking for help, prepare the error message, reproduction steps, and results of any comparison tests. Before sharing screenshots or diagnostic records, hide subscription links, passwords, identity fields, and server access credentials. Records may also include visited domains, so review them before sending. For subscription, network, or account questions, see the relevant section in Frequently Asked Questions. For rule syntax, see the Configuration Reference.
After the first connection works, keep a record of a configuration that you have verified. When updating a subscription, changing rules, or enabling On Demand later, continue to change one thing, test once, and record the result. If something fails, you can return to the last verified settings instead of starting over with installation.